
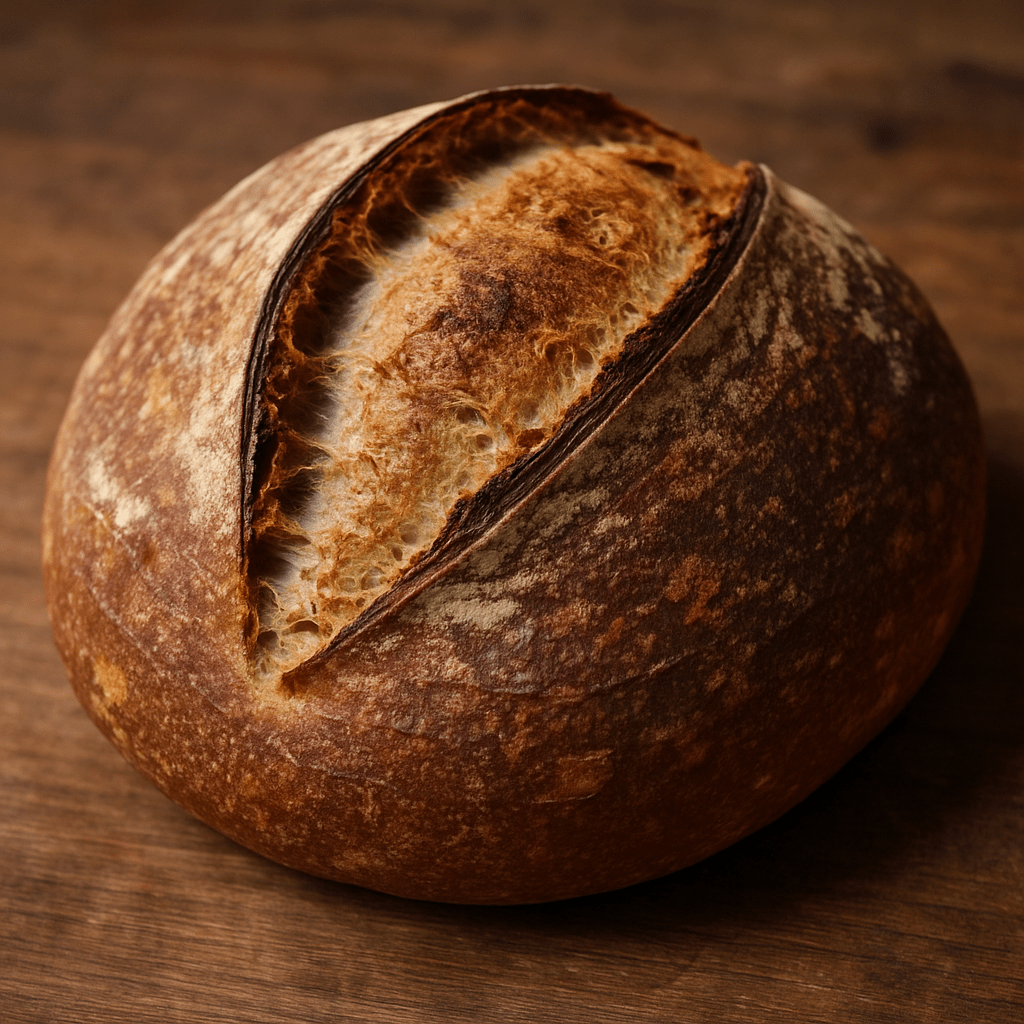
So you have sourdough starter, now what? If you’ve ever dreamed of baking your own crusty, golden loaf of sourdough at home — you’re in the right place. This beginner sourdough bread recipe is simple, reliable, and perfect for new bakers looking to make sourdough at home.
No fancy equipment or advanced techniques required — just a little patience and some love for carbs.
4 Ingredients | Total Time: 48 hours
Ingredients
- 50g active sourdough starter
- 350g filtered water (room temperature)
- 10g fine sea salt
- 500g organic unbleached all-purpose flour
What You’ll Need
- A sourdough starter (active and bubbly)
- A large mixing bowl
- A Dutch oven or oven-safe pot with lid
- A little time (most of it is hands-off)
The Day Before You Bake
Feed Your Starter
Feed your sourdough starter about 12 hours before baking. It should be bubbly, doubled in size, and pass the float test when ready. If the temperature is warmer, it might not take as long to double.
Mixing Your Dough
- In a large bowl, mix the sourdough starter and water until fully combined.
- Add the flour and salt, then stir until everything is incorporated. The dough will look rough and shaggy at this point.
Cover the bowl and let the dough rest for 30 minutes.
Stretch and Folds
- After the 30-minute rest, perform your first stretch and fold:
Gently pull one side of the dough upward and fold it over itself. Rotate the bowl and repeat on all four sides. - Rest for another 30 minutes, then repeat the stretch and fold process a second time.
Cover the bowl and allow the dough to rise at room temperature for 7 to 10 hours depending on the temperature of your house. It should be almost doubled and have a light, jiggly texture.
Shaping the Dough
- Lightly flour your work surface and turn the dough out onto it.
- Pull each corner of the dough into the center to form a rough ball.
- Flip the dough so the seam side is down. Use your hands to cup the dough, pulling and rotating it gently toward yourself to tighten the surface.
Cover with a damp towel and let it rest for 10 minutes.
Final Shaping and Cold Proof
- Gently stretch the dough into a rectangle.
- Fold it like a letter — top third down, bottom third up — then roll it up tightly.
- Place the shaped dough into a bowl or proofing basket.
- Cover and refrigerate overnight (8 to 24 hours).
Baking Day
- Preheat your oven to 500°F with your Dutch oven inside (including the lid).
- Take your loaf out of the fridge, put it on parchment paper, and score the top of the loaf with a knife.
- Once preheated, turn down the oven to 450°F and carefully transfer the dough into the hot Dutch oven.
- Cover and bake for 30 minutes.
- Remove the lid, reduce the oven temperature to 425°F, add a sheet pan below the dutch oven so the bottom of the loaf doesn’t burn, and continue baking for about 15 minutes until golden and crisp.
Cool and Enjoy
Remove the bread from the Dutch oven and place it on a wire rack. Let it cool for at least 2 hours before slicing. This rest time allows the crumb to set and prevents the interior from becoming gummy.
Tips for Success
- See if someone you knows has sourdough starter that you can have. People are always looking to give away starter. If you use a well-established starter, the process will be much easier. It also is known to have a better flavor the older your starter is.
- If your kitchen is cool, let the dough rise near a warmer spot, such as on top of the fridge or near the oven (but not too hot).
- Be patient during the cool-down — it’s worth it for a better texture and flavor.
